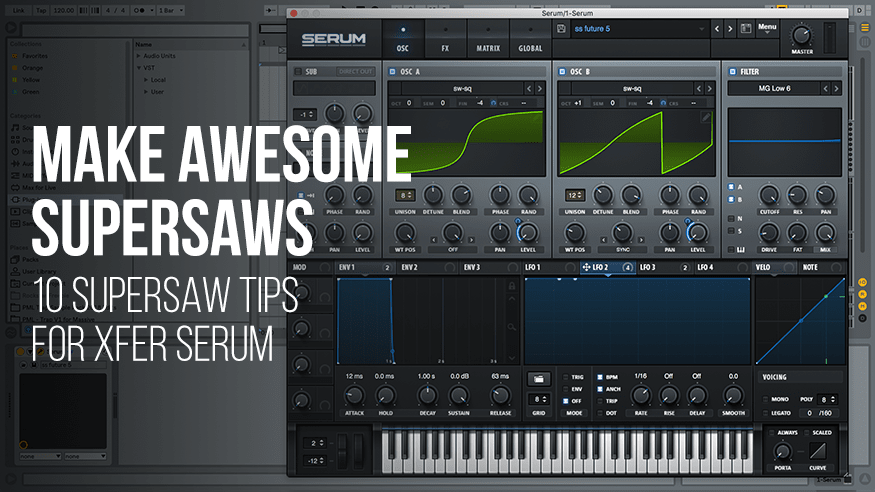
Thanks to artists like Flume, supersaws have become a very popular sound in EDM. Making a great supersaw isn’t as easy as choosing a saw wavetable and cranking the Unison. There’s a lot of tricks you can use to make that sound more exciting. In this article I’ll show you what you can do inside Xfer Serum to make your supersaw stand out.
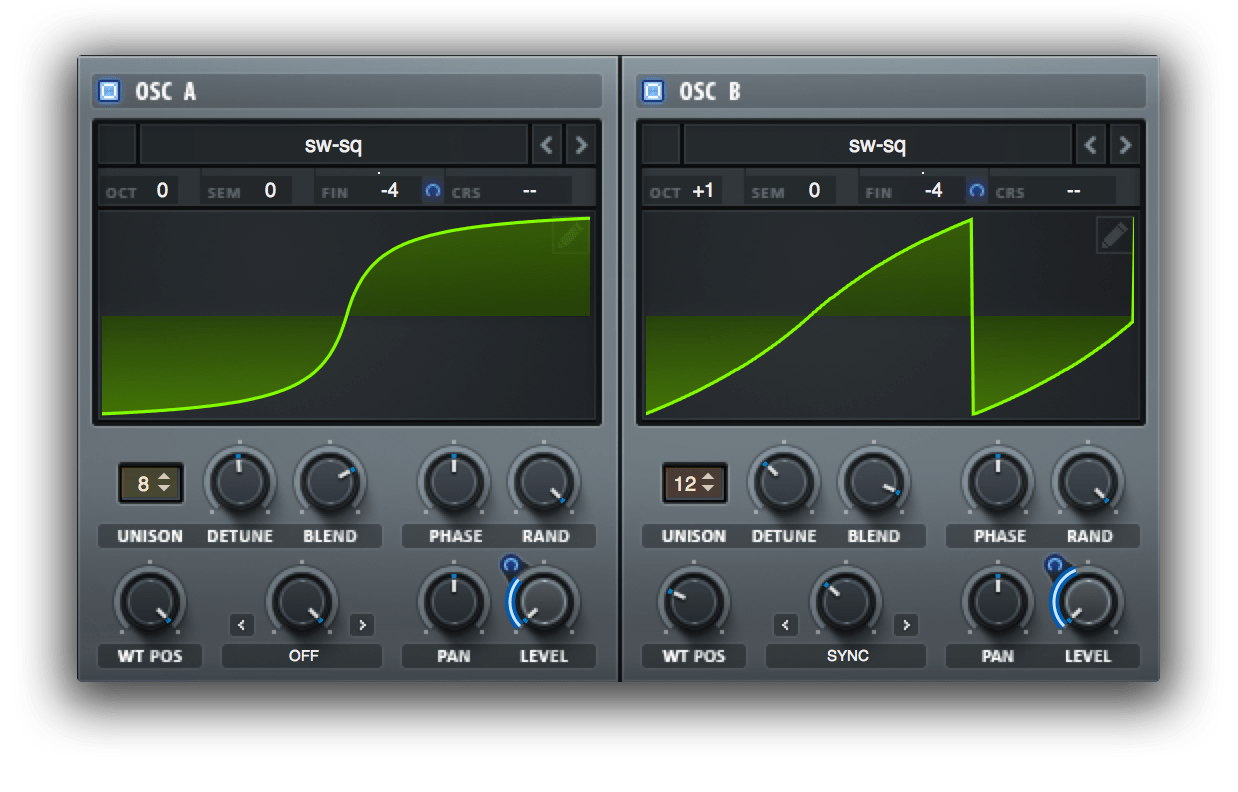
1. Use both oscillators for different octaves
Serum has two wavetable oscillators, so I like to use one for lower frequencies and transpose the second oscillator one octave up. I use the B oscillator for rich, harmonic frequencies, while the A oscillator makes sure there’s enough lower frequencies.
2. Use „Stack” for upper harmonics
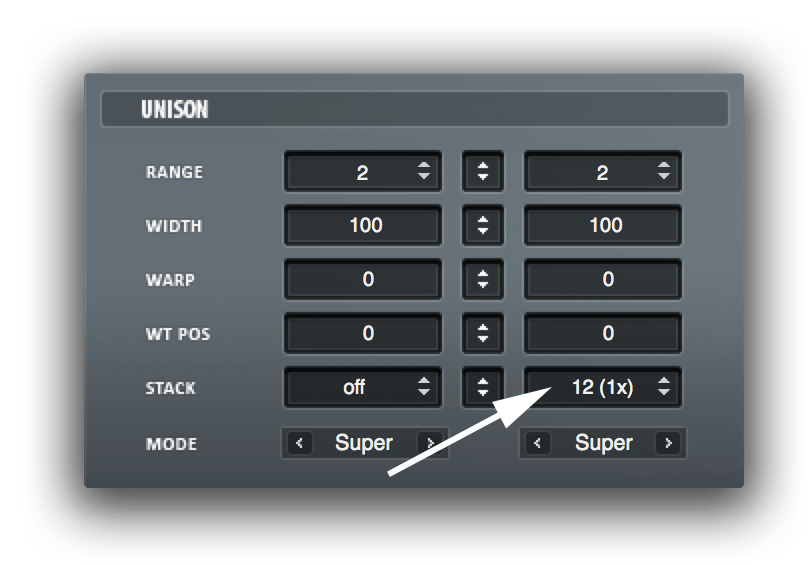
„Stack” is a hidden Serum function in the „Global” tab. It allows you to transpose some unison voices up and down, so that one oscillator plays more than one octave. I like to use this option on the B oscillator to create rich upper harmonics. The „12 (1x)” setting transposes some unison voices up one octave and creates very nice harmonics.
Stack off:
Stack on:
Looking for more general sound design tips for Serum? Check out this article.
3. Use „Bend +” warping to make sawwaves square-ish
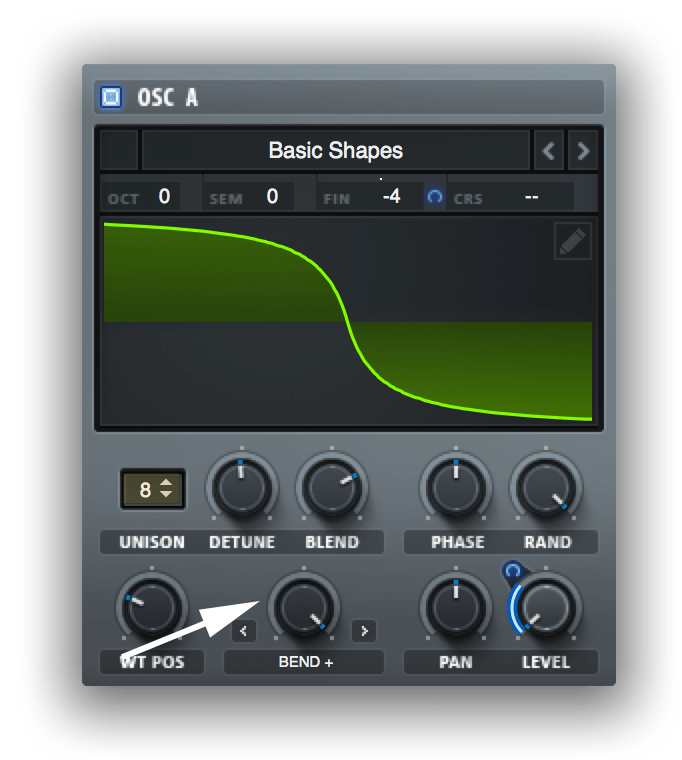
Sometimes it’s nice to change the sound of the sawwave into more of a square wave. There’s an easy way of doing it - pick „Bend +” in the warp selector on an oscillator and adjust the warp knob. If you want to apply more warp settings now, you can use the „Render Oscillator” option from the Menu in the upper right corner of the synth.
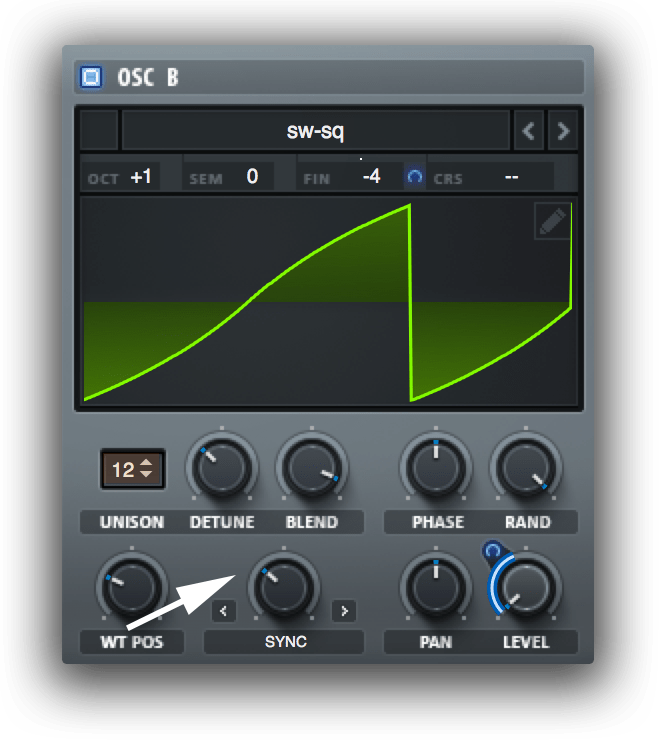
4. Use „Sync” warping to create upper harmonics
If I’m in need of even more upper harmonics on the B oscillator, I throw in some „Sync” warping. Low „Sync” values are perfect for adding harmonic content. Combine this with the „Stack” option and there may be no need to add a noise oscillator - Osc B alone is going to create enough high frequency content.
Check out this video on how to make Future Bass like a pro.
5. Use Multiband Compression
Serum’s Compressor has a „Multiband” mode, which is great for adding „OTT”-type compression to supersaws. Here’s how to use it. First, crank the „Mix”. I like to work with the Compressor while fully hearing what it’s doing. I keep all other knobs other than the „Threshold” all the way down. This way the Compressor isn’t actually compressing the sound much, it’s just giving the supersaw a bit of extra character. Now all you need to adjust is the first „Threshold” knob - mess around and achieve a sweet spot for yourself.

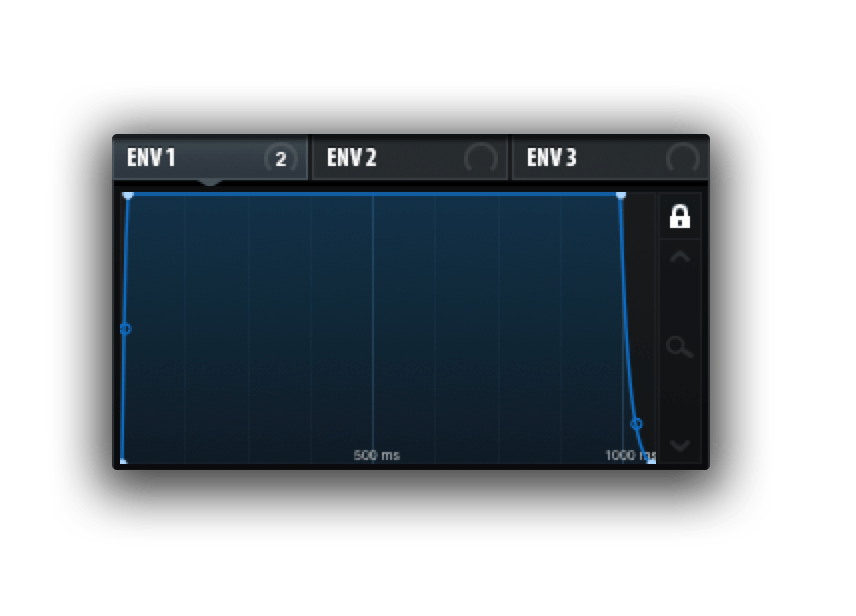
6. Map „Envelope 1” to the „Mix” knobs on FX
Some effects, like Dimension may give you unwanted delays. To avoid that, you can simply map Envelope 1 to the Mix knob. Env 1 controls the volume of the synth, so it should cut off any unwanted delays after the release time. You can use this function even with Reverb - sometimes it’s nice to add a splash of wide reverb, but to avoid the reverb tail, you can use this tip.
7. Add character to the sound by using Chorus and Flanger
If you’re in need of an original sound, try using Chorus or Flanger. Chorus can give you a wide, detuned sound, while Flanger can be used to add a bit of wobbly spark to high frequencies. These effects, used in moderation, may have a very nice impact on the sound.

8. Add Hyper and Dimension to make the sound bigger
Hyper is an effect which can multiply the sound into a few unison voices and detune them. This can result in a very big and detuned sound, but if you don’t go crazy with the Rate and Detune, you can actually improve your supersaw by a lot. Dimension is pretty similar - it works by adding short delays to the sound. Keep the Size low and map Env 1 to the Mix knob to avoid hearing delay.

Check out this video on making the future bass synth from Mura Masa's "Firefly".
9. Use subtle Delay to add Haas effect
This tip is very optional, because there may be no need to add width to your supersaw if you’ve already made it big with other effects. If in some case your supersaw is still not wide enough, try to add Haas effect with Delay. Keep the Feedback all the way down and turn off BPM & Link. Now delay one channel by a few milliseconds more than the other one. If the effect is set to „Normal” and you’ve picked enough frequencies with on the filter panel, you should hear your sound get wider as you turn up the Mix.

10. Use EQ to polish up the sound
Serum’s EQ may not be the greatest EQ ever made, but it’s certainly useful for supersaws. All you pretty much need is two curves - one highpass curve to cut excess low end, and another one to boost high frequencies. This step is very important - most supersaws boost the high end by a lot. Excess low end may also need to be removed, so that it doesn’t clash with the bass, or to make the supersaw sound a less heavy.

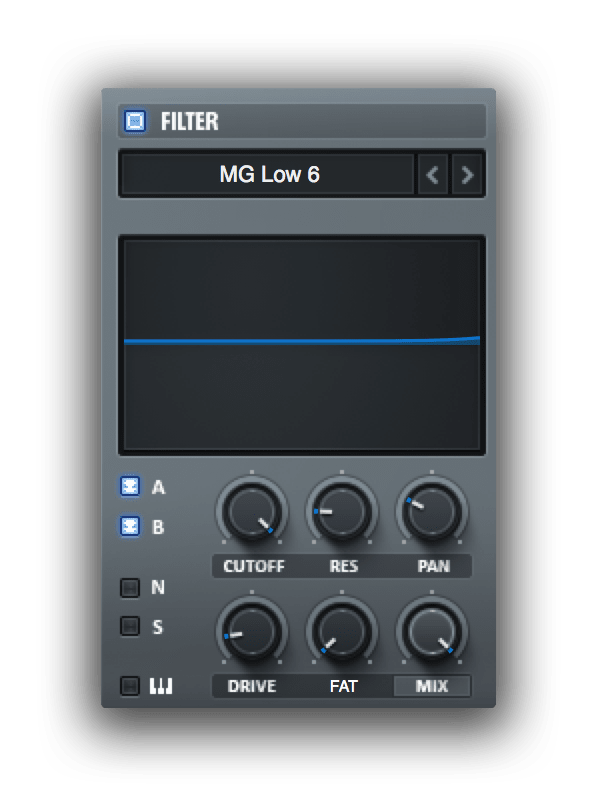
Bonus tip: Boost high frequencies with Filter’s lowpass curve
Sometimes I find that the Filter’s lowpass curve is ideal for adding very nice, airy top end. I like to choose the „MG Low 6” curve, go all the way up with the Cutoff and adjust the Resolution. This gives me a lot of control over how airy the synth is.
All of these effects can be applied to one instance of Serum to make one, huge sounding patch. Bear in mind that layering is also very cool - you have a lot more options of creating interesting sounding supersaws when you do that. I just think that layering is not necessary - you can achieve an awesome sounding supersaw with just one synth.
This is exactly how I achieved the supersaw in our project file - Shipwrecked. I applied all of these tips to the supersaw, and it turned out great. Check out the project file here!
Shipwrecked Future Bass / Ableton Template
Thanks for checking out this article. I hope you found something useful!
About the author:
k-pizza
 I’m a music maker who likes to share his experiences with other producers. I regularly show up with tutorials, articles & project files at PML.
Skype lessons with me: http://bit.ly/pml_s_one2one