Hi! My name is Boris and in this tutorial I’m going to show you how to make an awesome polymetric lead synth pattern for melodic techno.
Let’s listen to it first:
Before we get into the details, if you like what we’re doing consider subscribing for more ableton live tips like this one.
The template we’re using in this video is called Desert. What’s so cool about this one is that it’s all produced with only Live and Analog - all of the synths you heard come from this amazing device - so if you get the template you can learn a lot about sound design in Analog.
Let’s get started!
I'm going to make a new midi track. Let's drop a brand new instance of Analog.
We can actually start by just creating the midi notes pattern with the initial preset of Analog before we dive into the sound design.

The MIDI pattern doesn’t always end with the end of a bar, which makes it a polymetric pattern.
Let’s create a simple 7-note melody then:
(D3, F3, D2 - D3, F3, F2, D2)

We can actually repeat it over and over - and this is already a polymeter - we have an uneven number of 7 notes, so the loop is going to start in various places throughout the track.
Only on the seventh bar will it actually end with the grid.
We’ll just make one note shorter and proceed to the sound design:

Let’s start with the Amp Envelope.
For the Decay parameter, we’re going to choose around 220 ms (no sustain and no attack)

As for the oscillators, we’re going to use:
- Saw wave for Oscillator 1
- The Noise oscillator (turned down to -21 dB)
- Square wave for Oscillator 2 (with the pulse width lowered to 15% and gain down -10 dB)

Here’s a preview (filter section disabled, hence the bright signal)
Let's take a look at the Filter section.
We have the 24 dB Low Pass curve. Let's lower the Resonance a bit to around 10 percent, and we're going to lower the Sustain.
As for attack, we’re going for 40 ms, and the decay is going to be around 265 ms.
Envelope Amount we’re going to be setting at 4,50 (with the Cutoff - Freq knob - at 101 Hz)

You can hear that it already starts sounding like a hypnotic lead.
To finish it off, we just need some effects:
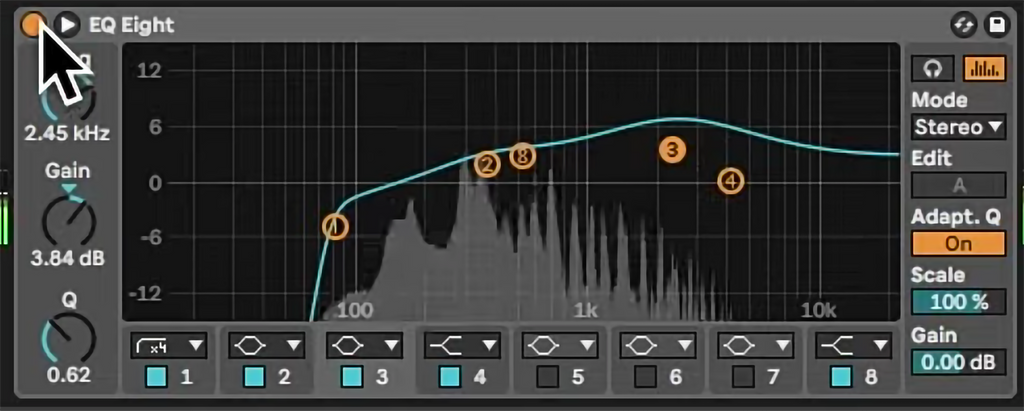
- A bit of EQ’ing - cutting lows and boosting 2.5 kHz

- Chorus - which adds a lot of detuned voices and has modulation applied
The version of Chorus we have applied is the Legacy Chorus which you can find under “Packs > Core Library > Devices > Audio Effects > Legacy”.

- A bit of delay (1/1) settings with a bit of feedback and filtering

- Reverb on a return track (“Long Tail” presets) with Sidechain Compression applied

Final Result:
That would be it for this tutorial guys! Thanks for checking it out.
Consider checking out our Music Production Academy - we've got a lot of courses for both beginners and more advanced producers.
I’ll see you in the next tutorials!
- Boris
See Also:
How To Make Skrillex Vocal Chords in Ableton Live (EDM) ]
How to Make Classic Kavinsky "Nightcall" Vocoder Sound from Drive Soundtrack
Ableton Analog Synth: Full Guide for Beginners

