Live 12 is an incredible update - and the biggest part of it is the newly improved Piano Roll. Now it's an incredible tool for creating melodic patterns and chords - especially with the updated scale features and generative tools. From the huge set of harmony-oriented updates, we’ve picked our top 7. These techniques can significantly improve your composition workflow in the new edition of Ableton. Let’s get started!
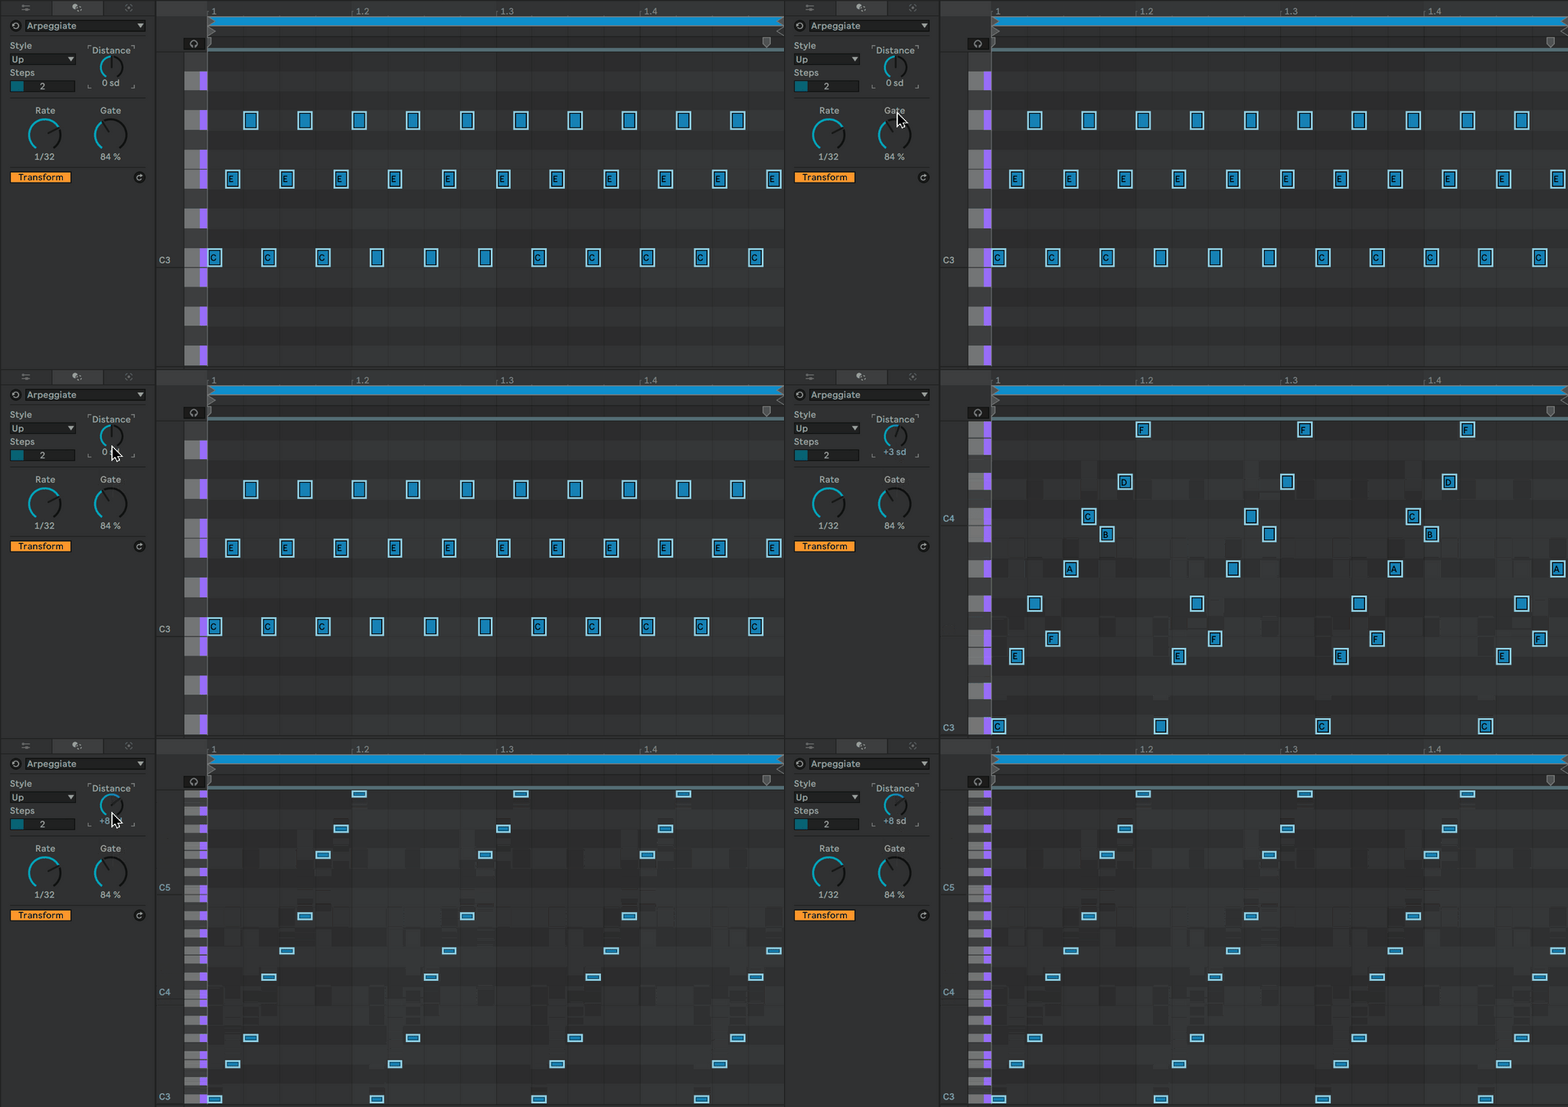
1. Piano Roll Arpeggiator
Before, Arpeggiator was only in the form of a MIDI device. In Live 12, you are able to create arpeggios straight from the Piano Roll - without having to “record the MIDI” to be able to do more nuanced edits. Here you are able to generate an arpeggiated pattern, and make advanced edits, while at the same time being able to clearly see each note.

2. Add Interval
In Live 12 you have an option to easily add intervals - for example to create chords. It works in a different way depending on whether you have the Scale function enabled in the MIDI clip. If it’s off, this option enables you to simply add intervals above or below the currently selected note. When you enable the scale, this function lets you add notes by a certain amount of steps above or below. It allows you to create chords extremely easily. For basic chord shapes, all you need is the Scale function and using the “+2 sd” setting. With a few clicks of the “Add Interval” button you can create thirds, fifths, sevenths and even higher chord extensions.

3. Fit to Scale
When you have a scale selected in the MIDI clip, this function shifts selected notes to the chosen scale. This option won’t work for transposition, but it’s useful if you’ve written chords or melodies that sound dissonant - it’s a very quick fix.

4. Ornament: Grace notes
In the “transformation tools” section, the Ornament option is particularly cool for making melodic phrases. All you need is to select a note and enable the “Grace notes” option. Live is going to automatically add a few notes before the selected one - and depending on whether the Scale is enabled in the MIDI clip, it will also make sure the grace notes are in key.

5. Strum
Ableton Live 12 brings the much-needed strum features - both in the Chord MIDI device, and MIDI clip settings. The MIDI clip strumming is especially flexible - you have a special curve editor which allows you to adjust exactly how you want the offsetting of notes to look like. This feature is not only useful for string instruments, but also to “humanize” any piano or synth chord progression.

6. Scale mode
In Live 12, you have the option of choosing a scale for the entire project (scale mode). It’s available in the top bar, next to the play and record buttons. If you enable that option, you will find the same icon (b/#) in various devices and clips across the entire project. You can either commit these devices to the scale, or leave them unaffected. This function makes it much easier to keep composing in scale, especially when harmony gets complex.

7. "Seed" melody generator
The “Seed” generative tool is amazing for writing melodic patterns. To use it, first you need to select the pitch and velocity ranges, as well as the note density and duration for the new pattern. Once that’s done, you simply click Generate and Ableton does its magic. You can re-generate for new patterns as much as you like, or tweak the parameters for instant adjustments.

See Also:
Top 10 Features in the Live 12 Update
Live 12 Piano Roll: Top 9 Drum Programming Updates


